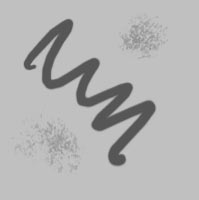
 This
is the bitmap I started with. Dark areas are higher and light areas are lower.
This
is the bitmap I started with. Dark areas are higher and light areas are lower.How to play:
Then click on the movie and use:
|
How does it work?
It's basically a twisted version of a bump mapping effect sometimes used in 3D games (twisted because flash lacks blending modes that are available on 3D hardware)
 This
is the bitmap I started with. Dark areas are higher and light areas are lower.
Within flash an inverted version of this bitmap is laid on top of it, with its alpha set so that the two bitmaps will cancel each other out giving a plain gray effect. At all times the top movies alpha value should be 100*bottomalpha/(bottomalpha+100);
If we now offset or stretch one of the bitmaps, the cancellation will be disturbed, resulting in the image above. A good series of images explaining the effect can be found in this gamasutra article.
In the movie the offset of one of the two
bitmaps is linked to the movement of the mouse giving the effect above. I used
'Trace Bitmap..' on the bitmaps. Flash will do sub-pixel placements of
vectors, so this results in smoother stretching and movement, giving a more
controllable effect.
In the Bump Mapping 2 I added a mask bitmap, a cheesy fade effect and a sound
effect.